Gravity Forms stands as a premier form builder for WordPress, offering unmatched versatility in form creation. However, one of its limitations has been the inability to assign different currencies to individual forms out of the box. This is where the Multi-currency for Gravity Forms addon comes into play. It introduces the flexibility of a currency switcher to your forms, while also giving you the option to stick with a single currency setup.
In this guide, I’ll walk you through the process of configuring a form to work with a currency different from your global setting.
Step 1: Purchase and Activate the Multi-currency for Gravity Forms Addon
Begin by purchasing the Multi-currency addon for Gravity Forms from this link. After purchasing, proceed with installing and activating the plugin on your WordPress site.
Step 2: OpenExchangeRatesAPI
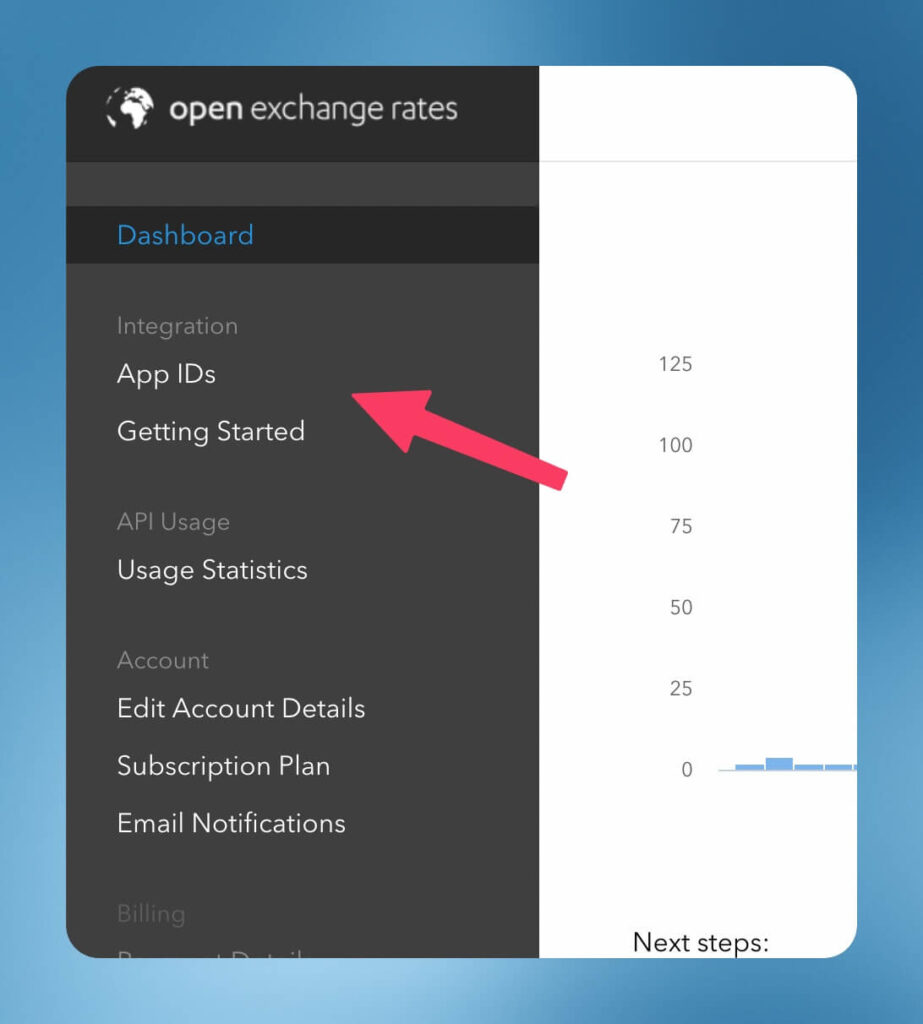
Go to this page and sign up for a free account. Once logged in, go to Dashboard >API page.
1. Navigate to OpenExchangeRates.org and sign up for a free account.
2. Once logged in, access the Dashboard and select the API page.
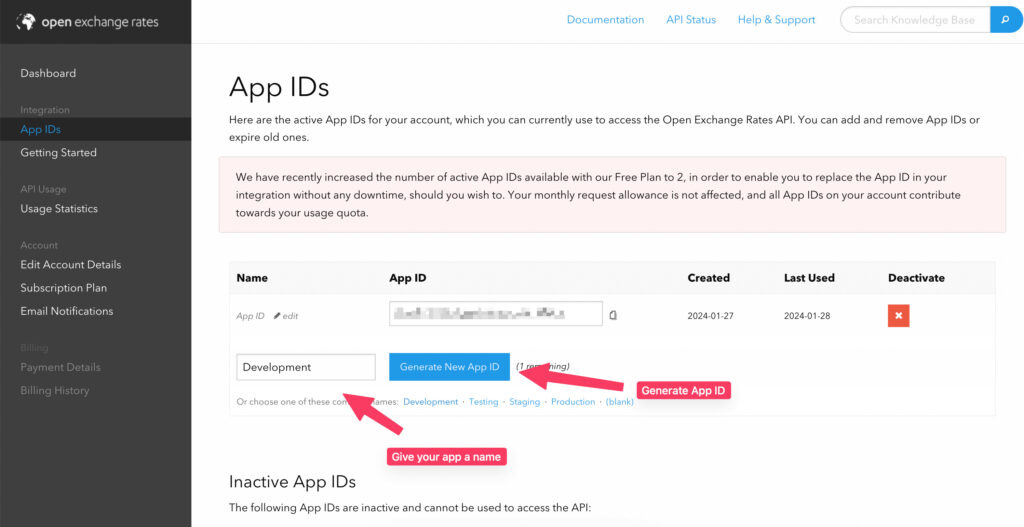
3. In the right pane, name your application and click the Generate New App ID button. Don’t forget to copy this App ID; you’ll need it for the integration step.
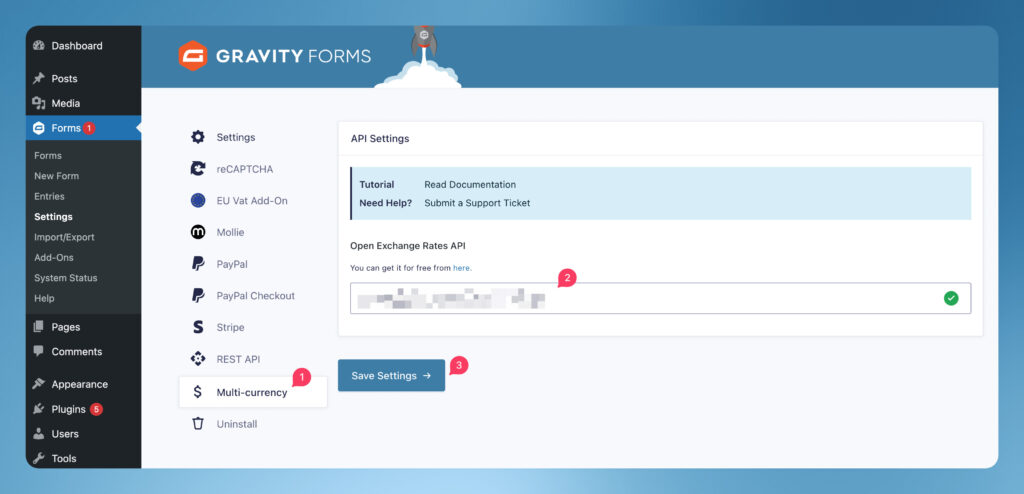
4. Proceed to the Gravity Forms settings, locate the Multi-Currency tab, and paste your App ID in the Open Exchange Rates API field. Save your settings upon completion.
Step 3: Create your form
With the multi-currency addon active and OpenExchangeRateAPI done, it’s time to create your form:
1. From the WordPress dashboard, select the Forms menu and opt to create a new form.
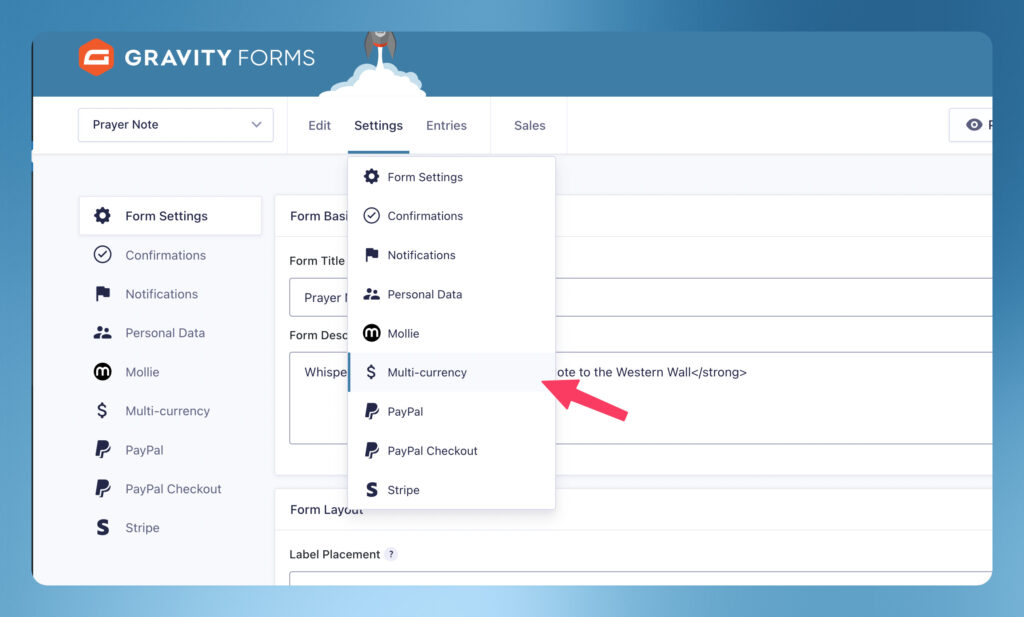
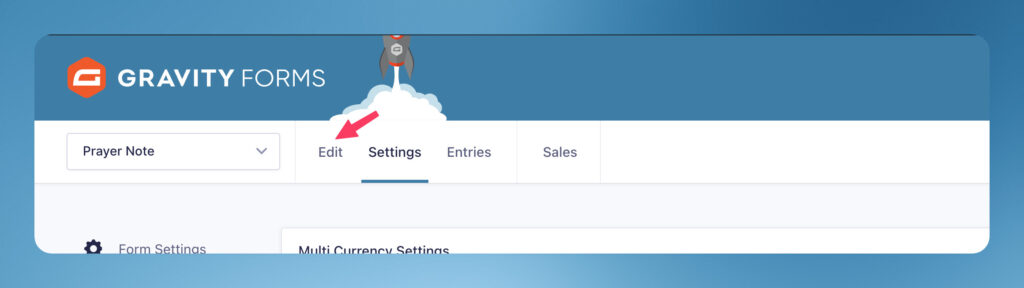
2. Once your form is outlined, navigate to the form’s settings menu and locate the Multi-Currency tab.
3. Adjust the following settings according to your needs:
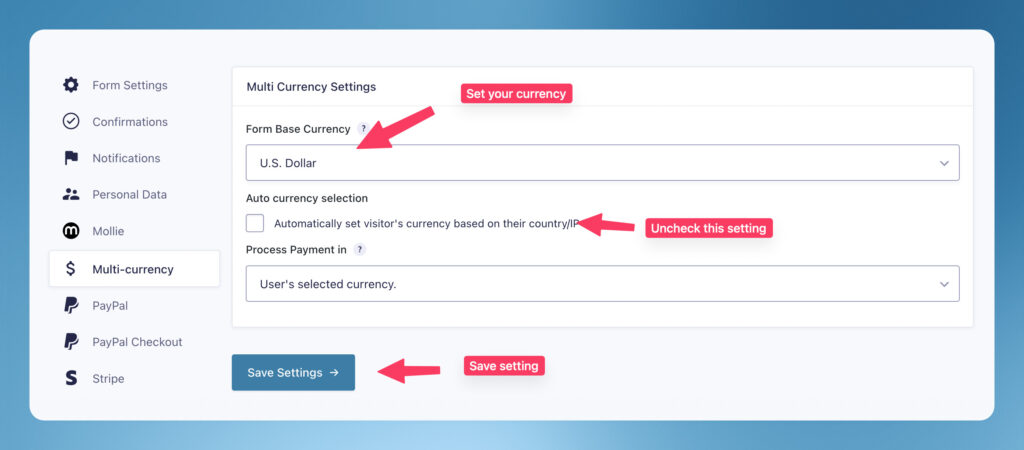
- Form Base Currency: This is where the magic happens. Specify the desired currency for this particular form in this dropdown.
- Auto Currency Selection: Disable this setting to prevent automatic currency conversion based on the customer’s location.
- Process Payment in: This option allows you to select the currency in which payments will be processed. If your payment gateway does not support multiple currencies, choosing the “Form’s Base Currency” is advisable. This setting ensures conversions are made from the selected currency to the base currency before processing the payment.
Once happy, save the multi-currency settings.
Step 4: Add Multi-currency fields
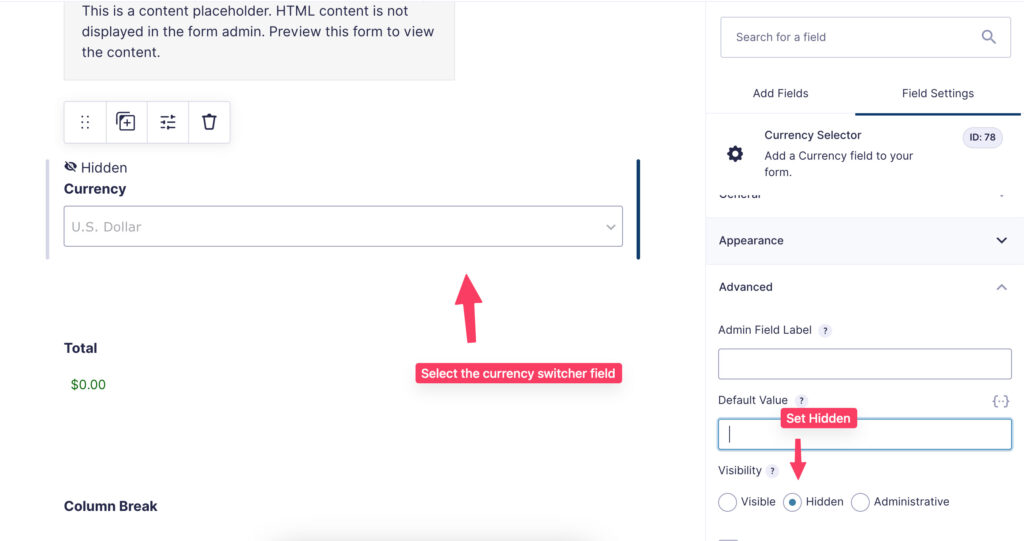
1. To add currency functionality to your form, open the form editor.
2. Add a Currency Switcher field by selecting it from the field list on the right panel.
3. Click on the newly added Currency Switcher field and proceed to the Advanced section. Under Visibility, choose the Hidden option. This step is essential if you wish to maintain a single currency view on your form.
Finally, after you’ve saved your form, navigate to the front end and preview your work to ensure everything operates as expected.
Through these steps, you’ve successfully tailored your Gravity Forms to work in a different currency.